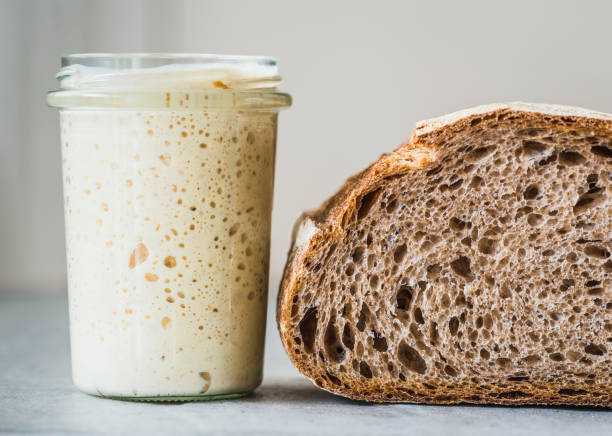
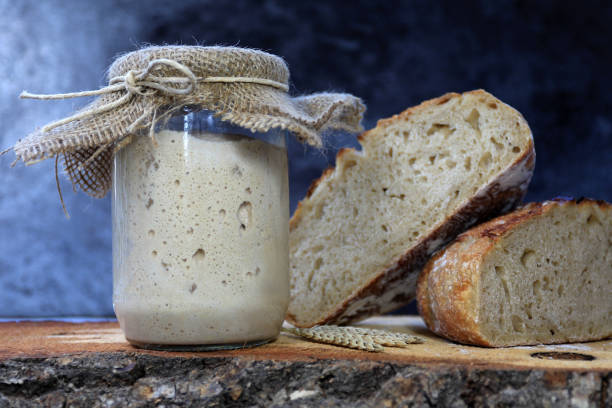
The foundation of exceptional sourdough bread begins with a sourdough starter kit, a collection of tools and ingredients designed to cultivate a live culture of wild yeast and bacteria. This starter acts as the natural leavening agent that gives sourdough its unique tang and texture. Maintaining a healthy starter involves feeding it flour and water regularly, and the kit typically includes a jar, thermometer, stirrer, and measuring tools to streamline the process. The right environment is critical: your starter should be kept in a warm, stable area to ensure active fermentation. Choosing a kit simplifies what might seem like a complex process, providing confidence to beginners and efficiency for seasoned bakers. A well-developed starter results in a bubbly, aromatic culture ready to lift your dough with flavor and structure. Since consistency is key in sourdough baking, a good kit ensures measurements and cleanliness remain on point. The tools provided also help avoid contamination and support easy observation of fermentation progress. Whether you’re beginning your baking journey or looking to upgrade your tools, investing in a complete and quality sourdough starter kit gives you a reliable head start on your artisan bread-making endeavors.
Choosing the Right Flour for Your Sourdough
Flour is really important for making sourdough bread taste and feel good. You can use all-purpose flour in a pinch, but bread flour is better since it has more protein, which helps make the gluten structure stronger. You can use whole wheat and rye flour to make the flavor deeper and richer. The kind of flour you choose also determines how much your sourdough starter grows. Different types of flour ferment at different rates, which affects how long it takes to rise and the crust. Bakers can make their own loaves that taste just right for them by trying out different flours. People typically suggest using organic, unbleached flours to make the fermentation process healthier and more responsive. Sticking to one sort of flour at first helps keep things consistent. But if you get the hang of it, mixing flours may give you aromas and textures that are hard to describe. Knowing things like the protein concentration, absorbency, and fermentation response of flour can make a big difference in how well you bake. Your bread will not only rise better, but it will also taste better and more complex. In the end, the flour you choose should match your baking goals and taste preferences. The equipment you use to prepare sourdough are just as vital as the wheat you use.
What Hydration Does for Sourdough Bread
The amount of water you use in relation to flour depends on how hydrated the dough is, which also affects the bread’s ultimate texture. Doughs with more water make crumbs that are more open and airy and a chewier texture, but they are also harder to work with. Doughs with less water are easier for beginners to work with and make a denser crumb. To make sure that the fermentation and rising behavior are always the same, the sourdough starter itself is generally kept at a certain amount of moisture. Knowing how much water is in your dough—usually between 60% and 85%—can help you guess how it will act when you combine it, prove it, and bake it. To master hydration, you need to know how to change it based on things like humidity and temperature. A digital kitchen scale is highly suggested because it’s important to get the measurements right. If you add too much water to the dough, it can spread too much when it bakes. If you don’t add enough water, the dough might not get the correct crust or crumb. You can make the changes you need by paying attention to how the dough feels. Is it sticky, stretchy, or smooth? Water isn’t the only thing that influences hydration; it also affects how fast fermentation happens, how crisp the crust is, and even the taste. As you get better at baking, you’ll get better at knowing how thick or thin the dough should be. This will boost your confidence and help you bake more successfully with fewer surprises.
Fermentation: The Secret to Tasty Bread
Fermentation is what makes sourdough bread taste good and hold its shape. This happens because yeast and bacteria are already in the bread. A healthy beginning breaks down the starches in flour into simpler sugars, which microorganisms then eat to make gasses, acids, and alcohol. This is how the dough ferments. The long fermenting period is what makes sourdough taste so good and have a chewy texture. Time and temperature are very important. Fermenting for longer periods of time at colder temperatures usually makes the flavor more complex. After mixing and before shaping, the dough goes through bulk fermentation. This lets it grow and get stronger. At this point, the dough will start to feel light and stretchy. Fermentation also helps the bread digest better by breaking down gluten and phytic acid, which makes nutrients easier for the body to use. The dough won’t rise well and can taste flat if it isn’t fermented enough. On the other hand, too much fermentation can make things sour and cause them to fall apart. Getting the timing of this step right is very important for getting the same results every time you bake. You may improve your loaves even when recipes are different by paying attention to how the dough behaves, such its bubbles, flexibility, and smell.
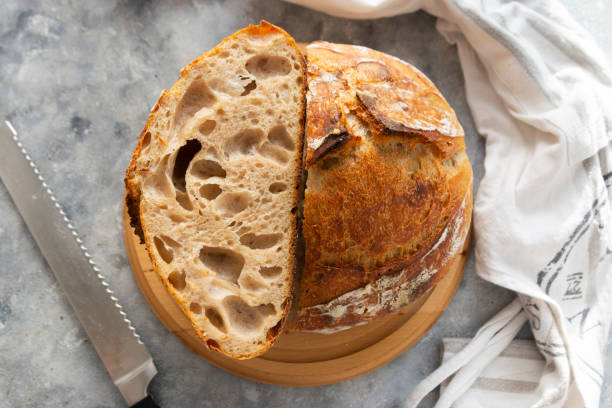
Ways to score your bread to make it seem better
Scoring isn’t just for looks; it’s a way to control how your bread rises while it bakes. If you don’t score the dough correctly, it could rupture in the oven. A sharp blade or lame is sometimes used to make fast, planned cuts on the dough’s surface. These slashes make controlled vents for steam, which helps the bread rise evenly and makes a pretty ear or crust edge. It’s important to practice different scoring patterns since the angle, depth, and position of each cut affect how the bread opens up. Beginners often use simple designs like a single slash or a cross. More experienced bakers could try more complicated designs like leaves or spirals. Proper scoring also helps make the crust crisp but not too thick, which changes the final texture. When to score the dough is important. You should do it just before baking, when the dough is still cold from the fridge but hard enough to keep its shape. This art form gives a personal touch to each loaf you make and makes them go from simple to beautiful. Scoring isn’t only for looks; it’s a science that affects the end result.
How to Handle and Shape Sourdough Dough Shaping sourdough is important to keep its shape while it rises and bakes. This stage makes the surface tension stronger, which helps the dough keep its shape and rise higher in the oven. After the bulk fermentation stage, the dough is carefully rolled out onto a floured surface and left to rest for a short time, which is called “bench rest.” The dough is easier to shape because the gluten relaxes during this period. Depending on the shape of the loaf you want and how you want to bake it, you can use different techniques like the boule (round) or bâtard (oval). The most important thing is to work rapidly but carefully so that the air pockets that formed during fermentation stay intact. If you work the dough too much, it may lose its shape. If you don’t work it enough, it may become loose. A dough scraper can help you move the dough around and shape it well. Shaping the same way every time also helps the crumb be even and the look be professional. With experience, shaping becomes second nature, a rhythmic activity that shows both talent and knowledge of how dough works. The idea is to make a tight surface that supports the oven spring and shows off the bread well. Even though this step is typically skipped, it can make or break your final bake.
Cold Proofing to Improve Flavor and Structure
To cold proof or retard the dough, you put the molded dough in the fridge for a long time, usually 12 to 24 hours. This stage slows down fermentation, which lets the flavors get stronger and the gluten structure get stronger without over-proofing. It also makes the dough firmer, which makes it easier to score before baking. It’s important to keep the dough moist and in shape while it’s cold-proofing by putting it in a covered container or a floured proofing basket. The cold slows down the yeast, but the lactic acid bacteria keep working, which makes the bread taste more sour. This method is very useful for people who wish to bake at a time that works for them without sacrificing quality. A loaf that has been correctly cold-proofed will have a crust that is blistered, a rich flavor, and an open crumb. You have to be careful with the timing and temperature of the fridge since leaving the dough in the cold for too long might cause it to over-proof, which weakens the structure. When done right, cold proofing makes sourdough bread taste better and look better. This is why many artisan bakers prefer it over other methods that speed up the process.
How to Get the Perfect Crust When Baking with Steam
During the first stage of baking, steam is very important to get a shiny, blistered crust and a full oven spring. Steam protects the crust from hardening too rapidly when the dough goes into a hot oven. This lets the loaf rise all the way. The moisture also reacts with the starches on the dough’s surface, making a beautiful, caramelized crust. You can add steam to a home oven in a few different ways: by putting a tray of boiling water at the bottom, spraying the walls with water, or baking in a Dutch oven that is covered. People often use the latter for sourdough since it naturally traps steam. Timing is quite important: you should steam for the first 15 to 20 minutes, then take off the lid or the tray so the crust can get crispy. Without steam, the crust might form too soon, which would stop the bread from rising and make it dense. If you learn how to use steam properly, you can make bread that tastes and feels better than the typical loaf. Knowing how your oven manages steam can help you improve your baking so that you always get professional results.
How to Cool and Store Your Sourdough Bread
Cooling is just as vital as baking. Taking your loaf out of the oven might seem like the last stage, but it keeps becoming better as it cools. Putting the loaf on a wire rack lets air flow around it and keeps it from getting soggy. If you cut into bread too quickly, it can let out steam and make the crumb sticky. If you can, wait at least an hour or more before cutting. Once cooled, how you store them affects how fresh they are. Because sourdough has a crusty outside and a wet inside, it should be kept in a paper bag, a bread box, or wrapped in a towel so that air can get in and moisture can stay inside. You can use plastic bags to store things for a short time, but they can make the crust soft. You may freeze sourdough whole or sliced to make it last longer. A few minutes in a hot oven can bring the crust back to life. A sourdough loaf that is baked well stays fresh for a few days and can be utilized in various ways, like for toasts, sandwiches, or croutons. If you take care of the finished product, your hard work will pay off with a great experience from the first slice to the last.
Fixing common problems with baking sourdough
Every baker has problems, but sourdough is the hardest. Common difficulties include flat loaves, gummy crumbs, and flavors that are too sour. Your starter might not be working hard enough if your dough isn’t rising. Make careful to feed it every day and let it grow twice as big before utilizing it. If you don’t let the bread rise long enough, shape it wrong, or don’t add enough water, it can be dense. If something is gummy, it can mean that you cut it too soon or didn’t bake it long enough. Using a thermometer or changing the oven’s temperature can assist make sure the bread is thoroughly cooked. Is the crust too hard? The problem could be too much steam or baking it too long. If the dough sticks to the basket, add extra flour or cover it with a cloth. Part of learning involves trying things out and making mistakes. Taking notes might help you see patterns. You learn more about how things like temperature, timing, and ingredients work together with each bake. To get good at making sourdough, you have to learn from your failures. Be patient, have faith in the process, and enjoy tiny victories along the way.
Benefits of Using Proofing Baskets for Sourdough Success
Proofing baskets are essential for giving structure and shape to sourdough loaves during the final rise. These baskets, typically made of rattan or cane, help the dough maintain its form while also allowing air circulation for a drier outer layer that enhances crust development. The pattern left by the basket adds a rustic aesthetic to the finished loaf, enhancing its visual appeal. Experienced bakers often recommend using proofing baskets lined with cloth or dusted with rice flour to prevent sticking. The baskets support vertical rise, leading to taller, more defined loaves. They are especially beneficial for wetter doughs, which might otherwise spread out on a flat surface. By promoting even fermentation and offering structure, using proofing baskets becomes a key step in producing artisan-quality bread. They are reusable, easy to clean, and offer a professional edge to home baking. Many starter kits and baking sets now include baskets, recognizing their importance in the process. Integrating proofing baskets into your sourdough routine significantly improves both the quality and consistency of your loaves.
Conclusion
Crafting perfect sourdough bread requires more than just ingredients—it’s about having the right tools, techniques, and patience. From managing a healthy starter to mastering scoring and using proofing baskets, every step influences the final result. The tactile experience of shaping dough, the visual artistry of scoring, and the rustic charm of a well-proofed loaf combine to create a deeply satisfying baking journey. Quality tools enhance this experience, and brands like Abioto provide thoughtfully designed kits and accessories that empower bakers at all levels. Whether you’re just starting or refining your skills, having reliable equipment and understanding the process will take your sourdough to new heights. With time, practice, and a bit of experimentation, the art of baking sourdough becomes a rewarding ritual.