The shimmering surface of a freshly plastered pool is a sight to behold. However, over time, without proper maintenance, pool plaster can stain, crack, or deteriorate, compromising both its aesthetic appeal and structural integrity. Whether your pool is brand-new or recently resurfaced, knowing how to care for the plaster is essential to protect your investment and ensure long-term enjoyment. In this guide, we provide expert tips for maintaining your pool plaster and keeping your backyard oasis looking its best for years to come.
Why Pool Plaster Maintenance Matters
Pool plaster is the final sealant layer applied to the concrete of a pool. It provides a smooth surface that holds water and creates a clean, inviting look. However, plaster is porous and can be affected by:
-
Chemical imbalances
-
Mineral deposits
-
Temperature extremes
-
Physical wear and tear
Proper maintenance extends the life of the plaster, helps avoid costly resurfacing, and preserves the aesthetic appeal of your pool.
The First 30 Days: Critical to Long-Term Plaster Health
The first 30 days after plastering or replastering is the curing period, and it’s the most critical time for your plaster.
Key Tips During This Phase:
-
Brush the pool surface twice daily to remove plaster dust.
-
Avoid swimming for the first 3–7 days, as recommended by the installer.
-
Balance water chemistry carefully to avoid etching or discolouration.
-
Do not use heaters during the initial curing period.
Following the correct startup procedure during this window will set the foundation for long-term plaster integrity.
Regular Pool Plaster Maintenance Tips
1. Maintain Proper Water Chemistry
The number one rule in plaster maintenance: keep your pool chemistry balanced. Imbalanced water can etch the plaster, cause stains, or lead to scaling.
-
pH: 7.2–7.6
-
Alkalinity: 80–120 ppm
-
Calcium Hardness: 200–400 ppm
-
Chlorine: 1–3 ppm
Test the water at least twice a week using a reliable test kit or digital reader. Imbalances, particularly in calcium or pH levels, can cause the plaster to deteriorate prematurely.
2. Brush and Vacuum Weekly
Brushing prevents algae and dirt from embedding in the porous plaster. Use a soft-bristle pool brush to scrub the walls and floor. Follow up with a pool vacuum or robotic cleaner to remove loosened debris.
This simple routine helps prevent staining, scaling, and algae growth while keeping the pool looking fresh.
3. Monitor Calcium Deposits
If you notice white, chalky buildup, especially at the waterline or on plastered surfaces, it could be calcium scaling. Prevent this by:
-
Keeping calcium hardness within range
-
Using sequestrants to bind excess minerals
-
Avoiding high pH or alkalinity
In mild cases, brushing may remove the scale. For more stubborn buildup, use a pumice stone or a descaling agent approved for use in plaster pools.
4. Address Stains Promptly
Organic material (leaves, algae) or metal contaminants (copper, iron) can cause plaster stains. Early treatment is crucial.
-
Organic stains: Use chlorine-based shock or stain removers.
-
Metal stains: Use ascorbic acid or specialised metal stain removers.
Avoid harsh scrubbing with abrasive tools—these can scratch or wear down the plaster surface. Always test products in a small area before applying them to the entire surface.
5. Control Water Temperature
While temperature fluctuations are natural, sudden changes—like heating your pool too quickly—can stress the plaster. Gradually increase water temperature, especially during the cooler months, and always consult with a technician before adjusting heater settings in freshly plastered pools.
6. Watch for Cracks or Surface Roughness
Hairline cracks or rough patches may appear over time due to ageing or poor water balance. These need to be professionally inspected to prevent leaks or larger fractures.
-
Minor etching can often be resolved with polishing or acid washing.
-
Deeper cracks may require plaster patching or resurfacing.
Prompt attention ensures minor damage doesn’t escalate into major repair bills.
7. Consider an Annual Inspection
A yearly professional inspection can reveal hidden issues like:
-
Subsurface cracks
-
Mineral absorption
-
Delamination (separation of plaster layers)
Proactive checkups save money in the long run and help you plan for eventual resurfacing needs well in advance.
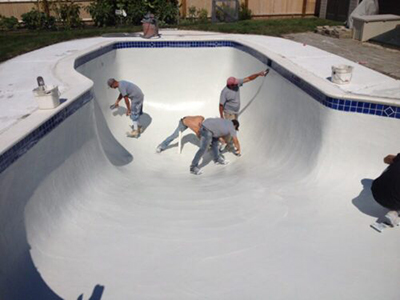
When to Resurface Pool Plaster
With proper maintenance, pool plaster can last 10 to 15 years. However, signs you might need resurfacing include:
-
Persistent stains that don’t lift
-
Pitting or flaking plaster
-
Surface roughness that feels like sandpaper
-
Significant discoloration
-
Leaks or structural cracks
Resurfacing not only restores the smooth texture and vibrant look but also provides an opportunity to upgrade with quartz or pebble finishes for enhanced durability and appearance.
Professional Help vs DIY Maintenance
While weekly maintenance like brushing and chemical balancing can be DIY, certain tasks should be left to professionals:
-
Acid washing
-
Crack repair
-
Resurfacing
-
Metal or calcium stain removal
-
Diagnosing water chemistry issues
Hiring experienced technicians ensures that your plaster is treated with the right materials and methods, avoiding unintended damage.
Conclusion: Keep Your Pool Plaster in Prime Condition
Your pool’s plaster serves as both a protective layer and the visual centrepiece of your aquatic escape. With consistent care, proper water chemistry, and preventive maintenance, you can extend its life well beyond a decade and keep it looking as beautiful as the day it was installed.