Nothing compares to the professional-level finish a DA polisher can produce for keeping your car looking its best. Whether you enjoy detailing or are a first-time DIYer, a DA polisher, or Dual Action Polisher, can help you remove swirls, scratches, and oxidation more successfully than hand polishing. Because DA polishers mix a spinning and oscillating motion that lowers the risk of burning paint or generating holograms, they are far safer for novices than rotary polishers. Though they are beginner-friendly, improper use of them can nevertheless provide disappointing results or worse harm to your car. This article helps you with a step-by-step, safe and effective guide to using a DA polisher.
Analysing the DA Polisher: What Differentiates It?
Understanding how a DA polisher operates and why it’s the preferred tool for many detailers will help you before delving into the hands-on method.
Mechanism of Dual Action
A DA polisher moves in two concurrent directions: orbital and circular. For beginners, this dual action is forgiving on paint and helps apply pressure more evenly. The oscillation reduces the possibility of paint damage by making sure heat doesn’t accumulate too rapidly.
Forms of DA Polishers
DA polishers come mostly in two forms:
Perfect for novices, standard DA polishers have a set orbital design.
Usually utilised by more experienced detailers, long-throw DA polishers cover more surface area with their greater orbital movement.
A basic DA polisher is usually the best option for someone just starting out as it provides a mix of performance and safety. However, if you are feeling confident and want to save a bit of time, looking at a long throw option is definitely worth it. Just be careful when using, especially for the first time.
Rotary Polisher
Unlike a DA polisher, a rotary polisher spins in a single, direct circular motion without oscillation. This makes it a more aggressive tool, capable of correcting deeper paint imperfections more quickly. However, it also comes with a higher risk of causing swirl marks, holograms, or even burning the paint if not used properly. Rotary polishers are typically reserved for experienced detailers who understand paint types and have a steady hand. They’re highly effective in skilled hands, but not recommended for beginners due to the steep learning curve and potential for error.
Step 1: Organise Your Tools And Ready The Workspace
Arranging the correct tools and building a safe, clean environment is a surefire way to help you be successful before you start polishing.
What You Will Need:
- DA polisher
- Polishing pads (these come in a variety of options for different purposes, such as Wool pads for heavy cutting paint corrections, to soft foam pads for finishing)
- Polish compounds (same as the above, there are different compound types for different tasks, such as heavy cut compounds like Menzerna HC 400 or Gyeon Compound Plus, which are best for heavy corrections, as well as lighter compounds like Menzerna SF 3800 or Gyeon Polish for adding gloss)
- Microfiber towels for removing residue
- masking tape for masking off sensitive places like trim and for sectioning off areas to be polished.
- Car wash products (will cover this off in the next section)
- Safety equipment (gloves, eyewear, maybe a mask).
- Extension cord and electricity source
Prepare the surroundings
Make sure your workspace is shaded and well-ventilated. Products may dry too fast from direct sunshine, producing surface residue. Make sure the area around your car allows for ample space for unrestricted movement, free from tripping hazards.
Step 2: Clean And Sterilise Your Car
Polishing a dirty car is not just useless, it is destructive. Imagine running sandpaper over your car, it’s not pretty. A good polish outcome depends on a surface free of flaws.
Here is where using high-quality car wash products is really important. Using a combination of a thorough foam pre-wash followed by a two-bucket wash approach with a premium car shampoo is key to preventing additional scratches. Rinse well, then dry with a fresh microfiber towel.
From here, you want to make sure you remove any entrenched contaminants using a clay mitt or clay bar in conjunction with a dedicated clay lubricant. Among these pollutants are brake dust, industrial fallout, and tree sap. This stage sharpens your DA polisher’s glide across the surface and boosts polish efficiency.
Step 3: Go Over The Paint And Select The Appropriate Products
Once your automobile is clean, look under natural or artificial light to find oxidation, swirl marks, and scratches.
Choose Your Pads and Polish
Different flaws call for different combinations of polishes, chemicals, and pads:
- Use a cutting compound with a solid foam or microfiber pad for heavy flaws.
- Moderate flaws: Use a polishing pad and a medium polish.
- Use a delicate foam pad and finishing polish to address light flaws or to add a final layer of gloss.
If you are polishing for the first time, or polishing a new car for the first time, always test how the paint reacts to your compound and polisher by testing it in a small section that is out of the way. This is where using a Paint Thickness Gauge is also ideal, as this will inform you as to how aggressive you can be across certain sections. Should the findings be favourable, use that combo for the whole car.
Step 4: Mask Sensitive Areas
Cover delicate areas, including plastic trimming, emblems, rubber seals, and sharp body lines with masking tape. Either too much heat from the pad or polish residue can ruin or discolour these areas.
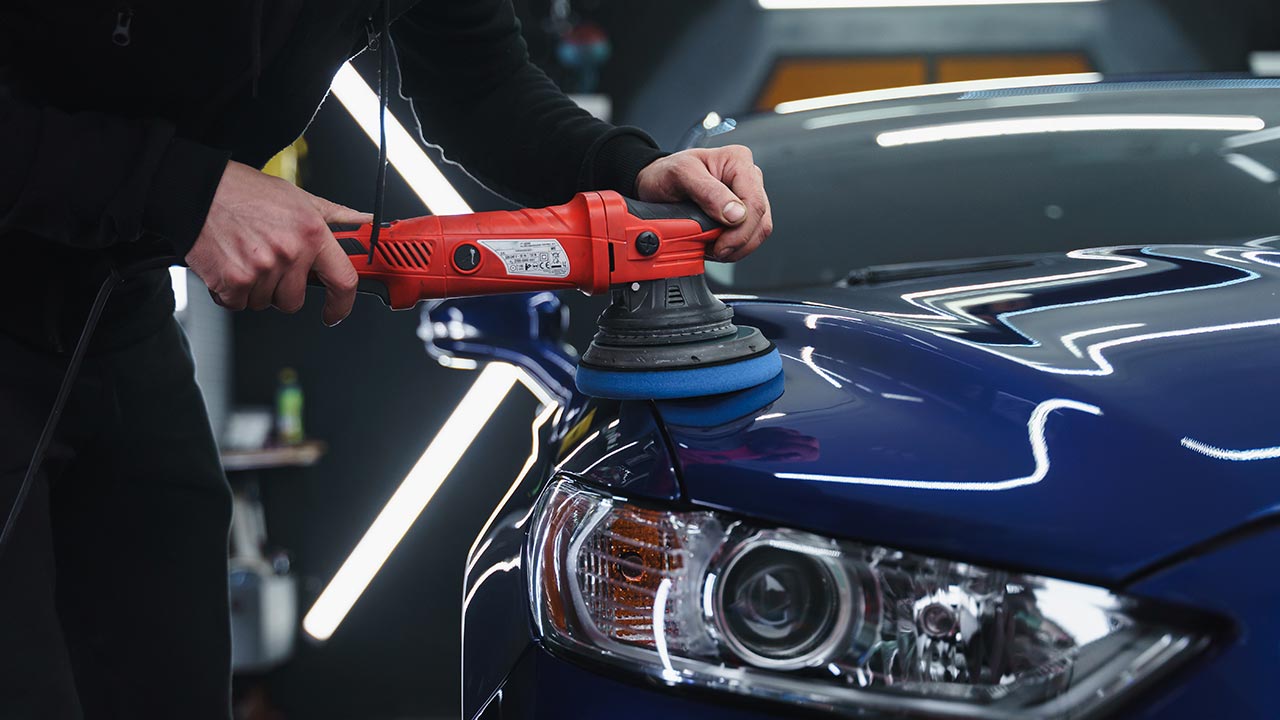
Step 5: Start Polishing – Technique and Safety Tips
The fundamental stage is now applying the DA polisher on the surface of your car. To guarantee a safe and successful outcome, follow this step very carefully.
Applying three to four pea-sized dabs of polish to the pad. Don’t feel like you have to overload the pad; less is often more in terms of polish.
Expanding the Product
To stop splatter, dab the pad over the section you are polishing to spread out your compound before turning on the machine. From here, simply lay the pad flat on the panel, then turn on the polisher. Work over a 2×2-foot section at a low speed, usually between 2 and 3, depending on your machine.
Polishing passes
Slowly turn up the speed to medium and operate the product under light, constant pressure. Left to right, then top to bottom, make overlapping passes in a crosshatch pattern. Steer clear of overly forceful pressure; let the machine handle the task.
Review Your Effort
Wipe off the residue with a fresh microfiber towel after polishing every part, and check the results. You may make one more pass if needed.
Polish residue and paint particles will also start to accumulate on the pad, therefore compromising its performance. Clean the pad between portions either using a pad brush or compressed air; if needed, substitute a new pad.
Step 6: Finish and Protect Your Work
Your car will look noticeably better right away after polishing is finished. The next step is to lock in this new look.
Final Wipe Down and clean
Using a clean Microfibre towel and quality surface cleanser or IPA, wipe off any remaining polish residue. It is best to do this across the total surface of the car, even if you don’t see any leftover residue, just to ensure you haven’t missed anything. Check your automobile under both natural and synthetic lighting to guarantee consistent results. If you are applying a protective coating, especially a long-life ceramic coating, it is also best practice to give your car one final two-bucket wash to be absolutely sure you have removed everything.
Applying a protective layer
Depending on your taste and degree of expertise, you will want to add a layer of ceramic coating, paint sealant, or wax. This stage gives gloss and guards against UV light, pollutants, and water spots.
Typical Errors to Prevent with a DA Polisher
While DA polishers are safe for novices, some common mistakes can still affect your results:
- Ignoring the wash step: Polishing over dirt can add micro-scratches.
- Using too much product could clog the pad and lower its effectiveness.
- Always hold the pad flat to prevent swirl marks and unequal pressure.
- Polishing too long in one area may generate heat and harm the paint.
- Not cleaning the pad lowers the cutting power and spreads residue.
Tips for DA Polisher Maintenance
Use these maintenance tips to keep your DA polisher in the best shape:
- After every usage, clean the machine: blow out any dust around vents and wipe down the outside.
- Look over the backing plate and cord. Replace should you see fraying or too much wear.
- Store adequately: Store your polisher dry and with little temperature variations.
- Taking care of your tool guarantees its constant performance and longer lifetime.
Selecting a DA Polisher for Novices
Here are some things to think about if you’re shopping for your first DA polisher:
- Ergonomics: Search for a lightweight design with a pleasant grip.
- Essential for working on various surfaces and products are variable speed settings.
- Brand reputation: Stay with well-known companies as Mint ProTools.
- Some kits include compounds and starting pads to enable you to get going immediately.
Purchasing quality equipment guarantees improved results and a more seamless learning environment.
Safely using a DA polisher improves the look of your vehicle and helps you save money on professional detailing. It may seem daunting at first to get everything right, but following this detailed guideline will enable you to gain confidence and produce a high-gloss, swirl-free result. Remember also the importance of preparation, particularly when it comes to utilising premium Car Wash Products to guarantee a surface free of contaminants. Even a novice can become proficient in machine polishing with the correct tools, methods, and some experience. So get your polisher, roll up your sleeves, and begin returning that showroom gloss to your automobile.