Building your own outdoor cooking station isn’t just about function – it’s also about creating a space you’ll be proud to show off. If you’ve ever looked at a neatly built brick BBQ in someone’s garden and thought, I could do that, you’re right. With the right approach, materials, and a bit of patience, you can create a grill that’s both durable and a real statement piece.
Whether you’re using a brick bbq kit for convenience or going full custom with a DIY bbq kit, the process follows the same key principles. This guide will walk you through every stage, from planning and foundation to the final touches – so you’ll be ready to fire up your first steaks, burgers, or even try an Argentinian BBQ-style feast.
Step 1: Planning Your Build
Before you even touch a brick, take time to plan.
-
Decide on the location
Pick a flat, stable area away from fences, sheds, and overhanging trees. You’ll want enough space around the BBQ for safe movement while cooking and for guests to gather. -
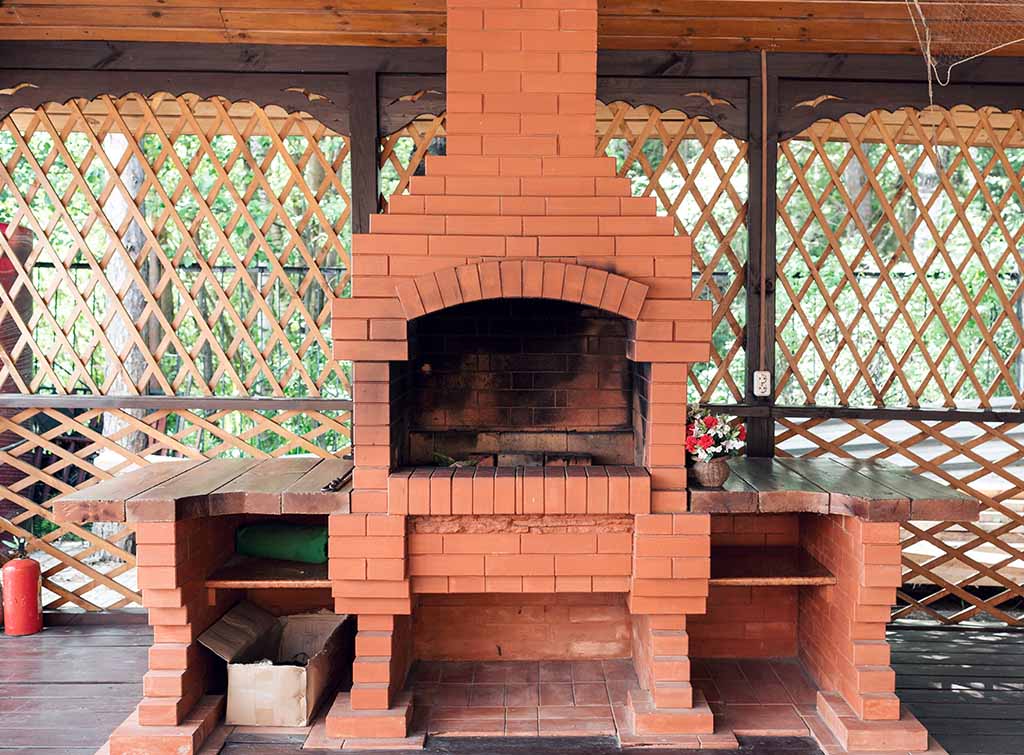
Choose your design
-
Using a brick bbq kit – This is the easiest route, as it comes with pre-measured components, a grill tray, and often a cooking grate that fits perfectly.
-
Going with a diy bbq kit – This gives you flexibility in size and style. You can adapt the shape to your garden layout, and it’s a good choice if you want extra features like side tables or storage.
-
-
Measure the area
Think about how many people you’ll cook for regularly. For big gatherings, you might want more grill space or even consider an Argentinian BBQ style layout with adjustable grates.
Step 2: Gathering Tools and Materials
Here’s what you’ll need:
-
Solid clay bricks (heat resistant)
-
Mortar mix (sand, cement, lime mix for BBQ builds)
-
Spirit level
-
Trowel
-
Shovel
-
String line
-
Bucket or wheelbarrow for mixing mortar
-
Safety gloves and goggles
If you’re using a kit, it will likely include the right type of bricks and a grill shelf, but you may still need to source mortar and tools.
Step 3: Laying the Foundation
A brick BBQ needs a stable base – without it, the structure can crack or shift over time.
-
Mark out your area using string and stakes.
-
Dig down about 100mm (4 inches) into the soil.
-
Fill with hardcore (crushed stone or gravel) and compact it well.
-
Pour a concrete slab about 75mm thick. Smooth it with a trowel and let it cure for at least 48 hours before starting brickwork.
If you’re building on an existing patio, make sure it’s level and can support the weight.
Step 4: Laying the First Course of Bricks
The first layer sets the tone for the whole project.
-
Mix your mortar to a workable consistency – not too runny, not too stiff.
-
Spread a bed of mortar on the slab where the first brick will sit.
-
Lay the brick and tap it gently into place with the handle of your trowel.
-
Check with a spirit level to ensure it’s perfectly straight.
-
Continue the first course, keeping a consistent 10mm mortar gap between bricks.
Take your time here – any mistake at the base will carry through the entire BBQ.
Step 5: Building Up the Walls
Once the first course is perfect, the rest becomes easier.
-
Stagger your joints for strength (half-brick overlap).
-
Keep checking both horizontal and vertical levels.
-
As you reach the height where your grill tray will sit, leave small gaps in the mortar to slide the tray supports in later.
-
If your bbq design includes a worktop or side table, plan those brick pillars now so the heights match.
For an Argentinian BBQ style, you may need to create taller side pillars to mount an adjustable grill frame.
Step 6: Adding Shelves and Supports
Many brick bbq builds have multiple cooking or warming levels.
-
You can set metal angle irons into the mortar joints to support grill grates or oven trays.
-
For a diy bbq kit, you may have pre-measured support brackets – make sure they’re level before the mortar sets.
-
If you’re adding a wood storage section underneath, leave an open space in the lower courses.
Step 7: Finishing the Structure
Once you’ve reached your desired height, finish with a neat top course.
-
You can cap it with flat paving slabs for a clean finish and extra durability.
-
Smooth any visible mortar joints for a professional look.
-
Let the entire structure cure for at least 48 hours before lighting a fire.
Step 8: First Firing and Maintenance
Before cooking, it’s important to cure your brick BBQ to prevent cracking.
-
Start with a small, gentle fire to warm the bricks.
-
Gradually increase the heat over a couple of hours.
-
Once fully heated, let it cool completely before your first cooking session.
For ongoing care, brush away ash after each use and avoid soaking the bricks with water when hot.
Pro Tips for a Successful Build
-
Choose the right bricks – Standard house bricks can crack under high heat. Use fire bricks or heat-resistant clay bricks for the cooking area.
-
Mix mortar in small batches – It can dry out quickly, especially in warm weather.
-
Keep tools clean – Dried mortar is difficult to remove from trowels and levels.
-
Consider airflow – Small gaps near the bottom can help your fire burn more efficiently.
Making It Your Own
The beauty of a brick BBQ is that you can customise it to your cooking style.
-
Argentinian BBQ lovers might add a deep charcoal pit with an adjustable grate to control heat levels.
-
Pizza fans can incorporate a small oven dome next to the grill.
-
Outdoor entertainers might add a prep station with tiled surfaces or even a built-in sink.
A diy bbq project also lets you play with brick patterns, colours, and finishes to match your garden aesthetic.
Why Building Your Own BBQ is Worth It
There’s a certain satisfaction in cooking over something you built yourself. It’s not just about saving money – although building with a brick bbq kit or diy bbq kit is often cheaper than buying a large pre-made unit. It’s also about creating a focal point in your garden that’s built to last for years.
A brick bbq is sturdy, weather-resistant, and gives you a solid cooking base for everything from weekend burgers to an Argentinian BBQ-style feast for friends and family. Plus, once it’s in place, there’s no more dragging out a wobbly metal grill every summer – your BBQ is always ready to go.
Final Thoughts
Laying bricks for a BBQ takes patience and planning, but the result is well worth the effort. With the right materials, a bit of skill, and either a ready-to-use brick bbq kit or a custom diy bbq kit, you can create an outdoor cooking space that’s both practical and a centrepiece for your gatherings.
Once it’s finished, you’ll not only enjoy the delicious food but also the bragging rights that come with saying, I built this myself. And who knows – your first project might even inspire you to try building other outdoor features, from pizza ovens to a full Argentinian BBQ setup.
So roll up your sleeves, grab your trowel, and get ready to turn those stacks of bricks into your dream garden grill.