
Email clients such as Microsoft Outlook use Offline storage table (OST) files to save a synchronised version of your mailbox data on your computer. By keeping this local copy, you are able to access and interact with your emails, calendars, and contacts without needing to be online.
OST files do have limitations, as they are associated with a respective Outlook profile and MAPI account; they can’t be opened or imported directly into other email services/applications. This is the inherent problem when attempting to move your data from Outlook to a cloud-based email service such as Gmail.
This blog will take you through the process of taking data from your OST file and converting it to be imported and fully functional in your Gmail account. Follow our guidance and start importing now.
Why Import OST to Gmail? | Reasons to Know
Look at the primary reasons below as to why import OST to Gmail:
- As organisations are transitioning from on-premise Exchange or Outlook to Google Workspace, such an import process helps in preserving historical emails.
- OST files are only accessible in Outlook, while Gmail is easily accessible from any device with a basic internet connection.
- In case an Outlook profile is damaged, an easy import to Gmail can help in recovering valuable data.
- Gmail comes with better features such as advanced search, labelling, and filtering, which can improve email management and productivity.
- Gmail also provides stringent security features like encryption, spam filtering, and malware detection, which help protect your email data.
Importing OST Files to Gmail | Top Solution
Below, we will help you out with the best solution to import OST files to Gmail.
Method 1. Import OST to Gmail Manually
The direct method to import OST to Gmail is not available, so we will have to go step-by-step and execute the import process. Here are the steps you need to follow.
Step 1. Locate OST files
To start with, you must locate the OST files. At times, the OST files are not at the default location [C:\Users\user\AppData\Local\Microsoft\Outlook], so you must know the accurate location.
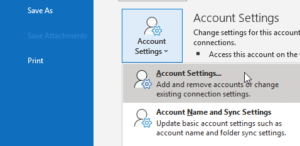
- Tap on the File menu and click on Account Settings > Account Settings.
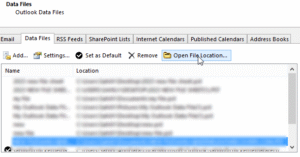
- Click on Data Files and select the OST file. Tap on Open File Location.
Step 2. Export OST file to PST
After knowing the precise location of your OST file, we will look to export it to PST. Follow the given steps.
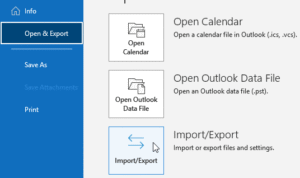
- Access Outlook and tap on the File menu. Click on Open & Export > Import/Export.
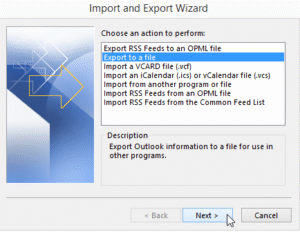
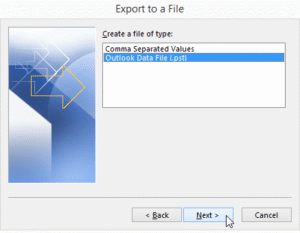
- From the Import/ Export wizard, choose the Export to a file option. Click on Next.
- Choose the Outlook Data File (.pst) option and hit Next.
- Choose the email account and its items that you wish to export as PST. Click Next.
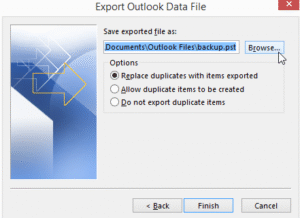
- Tap Browse and select the destination to save your PST file. Tap on Finish.
Looks like a tedious process to get your OST file converted to a PST file? We are here with an easier alternative that makes your OST to PST conversion a breeze. Use a top-quality OST to PST converter software like Kernel for OST to PST. Equipped with high-end features and an easy-to-use interface, the tool is ideal for tech and non-tech users.
Use advanced filters, preview features and wide-compatibility support and get your OST to PST converted in seconds with no data loss guaranteed.
Step 3. Use the GSMMO tool to import PST to Gmail
G Suite Migration for Microsoft Outlook (GSMMO), a desktop tool developed by Google, helps to import all your Outlook data files into Gmail with ease. With this Google tool, you can successfully migrate the PST file as given below.
- Download the G Suite Migration for Microsoft Outlook from any browser.
- Access the G Suite Migration for Microsoft Outlook app
- Put in the login details and hit Continue.
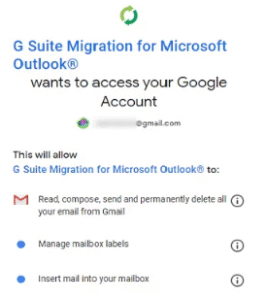
- When asked ‘GSMMO wants to access your Google account’, scroll down and tap on Allow. Wait for the confirmation message.
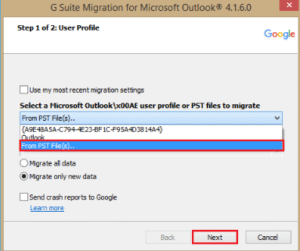
- As the new dialogue box opens, select From the PST file(s) option from the drop-down menu and hit Next.
- You will reach the location where all PST files are saved. In case you get to the wrong area or you have your PST files in some other location, paste that path in the Address bar. Tap on Next.
- Customise the migration settings as needed. Tap on Migrate.
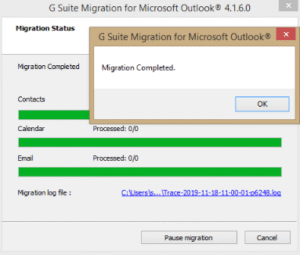
- The migration process begins now.
- As it is done, a successful migration message pops up.
- Sign in to Gmail, and you can find the newly imported PST file here.
Last Say
Importing OST to Gmail is not an easy endeavour, but with the proper guidance and expert help, you can execute the process with accuracy. Follow the steps carefully and do not miss out on any data files while importing. Also, when looking to convert OST files to PST, we recommend that you get over the manual method and opt for the OST file converter. Start the import process now and transition to Gmail with ease.
FAQs
Q1. Can Gmail open an Outlook File?
To access an Outlook file in Gmail, you need to import it accurately. When you import, it allows you to access your emails, contacts, calendars, data, etc. in your Gmail account/ For import, use the GWMMO tool.
Q2. How to clear the OST cache?
To clear the Outlook cache, follow the steps below:
- Type in %userprofile%\AppData\Local\Microsoft\Outlook in the taskbar and open it.
- Exit Outlook and select the OST file(s) you want to delete.
- Right-click and click on Delete.
- Restart Outlook.
Q3. Where is my OST stored?
The default location of the offline Outlook Data File (. ost) is: \Users\user\AppData\Local\Microsoft\Outlook.
Q4. How can I move the OST file location?
To change the location of the OST file, it is necessary to set the ForceOSTPath registry entry. Here are the steps to follow.
- Go to Start, type regedit within the Run dialogue box, and hit Enter.
- Go to the following registry subkey:
- HKEY_CURRENT_USER\Software\Microsoft\Office\xx.0\Outlook
- (Replace “xx.0” with your version of Office, e.g., 16.0 for Office 2016 or Office 365.)
- Right-click on Outlook, choose New, and select String Value.
- Name the new value ForceOSTPath and hit Enter.
- Right-click on ForceOSTPath, choose Modify, and put the full path where you wish to store the OST file.
- Hit OK and exit.