Creating videos used to be a long, time-consuming process. You needed cameras, lighting, editing software, and sometimes even a whole team. But today, technology has made video creation simpler than ever. Now, even beginners can create engaging, high-quality videos with just a few clicks.
In this guide, we’ll show you how to create your first AI-generated video easily, step by step.
What is an AI Video?
Before we start, let’s understand what an AI video is. In simple words, it is a video that is created using smart tools that automate most of the work. You provide the idea, script, or images, and the tool transforms it into a video with visuals, voiceovers, and effects.
This means you don’t need expensive cameras or advanced editing skills. AI-generated videos are perfect for social media posts, marketing videos, tutorials, and even personal projects.
How to Create Your First AI Video: Step-by-Step Guide
Step 1: Choose the Right Tool
The first step is to select the right platform or software for your video. There are many options available online, each with different features and pricing. Some tools are free, while others require a subscription.
When choosing, consider these points:
-
Ease of Use: Pick a platform that is beginner-friendly.
-
Templates: Tools with ready-made templates make video creation faster.
-
Customization: You should be able to add your text, images, or brand logo easily.
-
Output Quality: Check the video quality options before starting.
A popular platform like Pixele Studio offers ready-made video templates that are fast, easy, and professional-looking, which is great for beginners.
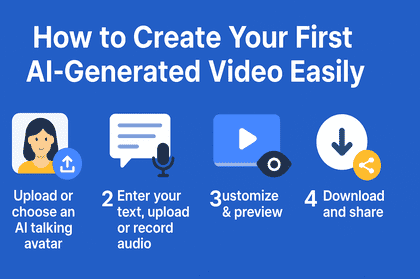
Step 2: Upload or choose an AI talking avatar.
Next, pick your AI avatar—the character that will “talk” in your video. You can either upload your own avatar or choose one from the platform’s library.
The avatar acts like a virtual presenter, so select one that matches the mood of your video. For example, a friendly avatar works well for casual tutorials, while a professional avatar is better for business presentations. This way, your video feels more personal and engaging.
Step 3: Enter Your Text, Upload, or Record Audio
Now it’s time to give your avatar a voice. You have three simple options:
-
Enter Text: Write an effective prompt for AI video generation.
-
Upload Audio: If you already have a voice recording, you can upload it for the avatar to speak along with.
-
Record Audio: Record your own voice directly in the platform for a natural, authentic touch.
This makes your video sound professional without needing any special equipment or editing skills.
Step 4: Customize & Preview
Once your avatar has a script or audio, you can customize your video. Change the avatar’s gestures, expressions, background, text style, or other elements to match your content.
After customizing, always preview the video. Watch it carefully to make sure the avatar speaks clearly, the text is easy to read, and everything looks smooth. Small tweaks here make a big difference in the final video.
Step 5: Download and Share
When your video is ready, download it in the format you need. Most platforms let you choose the resolution and file type depending on where you plan to share it.
After downloading, share your video on social media, your website, or presentations. These videos look professional and are easy to create, even if it’s your first time making one.
Tips to Make Your First Video Better
Here are some simple tips to make your first video even more effective:
-
Keep it short and engaging: People have short attention spans online. Focus on the key message.
-
Use Clear Text: Avoid long paragraphs on screen. Short, punchy sentences work best.
-
Focus on Quality: Even small improvements in images, music, or transitions make a big difference.
-
Experiment: Don’t worry if your first video isn’t perfect. Experiment with different templates, styles, and music to find what works.
-
Plan for Sharing: Think about where you will post your video and optimize it accordingly.
Common Mistakes to Avoid
Even with AI-generated videos, beginners often make some common mistakes:
-
Overloading Text: Too much text on the screen can confuse viewers. Keep it simple.
-
Skipping Preview: Always review your video to catch errors or awkward transitions.
-
Rushing: Take your time to edit and polish. A small effort improves the final video significantly.
Avoiding these mistakes will help your video look professional and engaging.
Benefits of Using AI Video Tools
Using AI video tools has many advantages, especially for beginners:
-
Saves Time: Videos that normally take hours can be created in minutes.
-
Cost-Effective: No need for expensive cameras, studios, or editors.
-
Easy to Learn: User-friendly interfaces allow anyone to create videos.
-
Professional Results: Templates and editing features give your video a polished look.
Even beginners can create videos that look like they were made by professionals.
Conclusion
Creating your first AI-generated video doesn’t have to be complicated. By following these simple steps—choosing the right tool, planning, using templates, adding your content, editing, and sharing—you can make professional-quality videos quickly.
The key is to start small, experiment, and gradually improve. With practice, you’ll be able to create videos that capture attention, share your message effectively, and even go viral.
So, pick a tool like Pixele Studio, follow this guide, and start creating your first AI-generated video today. You’ll be surprised at how easy and fun the process can be!
Visit Home page: Kinkedpress